How to let clients upload files directly to your cloud storage
Receiving files from clients should be one of the simplest parts of any project. You need a document, an asset or a deliverable. The client has it. All that has to happen is for the file to get from their computer to yours.
In practice, it is rarely that simple.
The problem with receiving files
If the file is small enough, it arrives by email. But “small enough” usually means under 25 MB for most email providers, which rules out video files, high-resolution images, design projects and anything compressed into a large archive. The client hits the attachment limit, and the back-and-forth begins.
The next option is usually a file-transfer service like WeTransfer. The client uploads the file, gets a link, sends it to you. You download it and re-upload it to wherever you actually store your project files. That works once or twice, but it breaks down fast: free plans cap uploads at 3 GB, links expire, and your files pass through a third-party server you have no control over. For anyone handling sensitive client data, that last point is a real concern.
Then there are shared cloud folders. Google Drive, Dropbox, OneDrive. You create a folder, invite the client, hope they accept the sharing invitation, manage their permissions, and deal with the inevitable “I can’t access the folder” message. If you work with multiple clients, you end up managing dozens of shared folders, each with its own permission set. It works, but it is a lot of overhead for what should be a simple upload.
The core issue is that none of these tools were designed specifically for receiving files from external people into your own storage. They were designed for sending files, collaborating on documents or syncing across devices. Receiving files is a different workflow, and it deserves a purpose-built solution.
How file request tools work
A file request tool flips the direction. Instead of you sending something to the client, you create an upload link and send that to the client. They open the link, select their files and upload. The files land in a location you control.
The key difference from shared folders is that the uploader never gets access to your storage. They cannot browse your files, delete anything or see what else is in the folder. They can only upload to the specific destination you defined. This is a much better model when you are working with external people who should not have ongoing access to your systems.
How File Requests work in Nubbo
Nubbo is a web-based file manager for S3-compatible cloud storage. It connects to your existing bucket on AWS S3, Cloudflare R2, DigitalOcean Spaces, Wasabi or Backblaze B2, as well as any S3-compatible or self-hosted server, and provides a visual interface for managing, sharing and receiving files. Here is how File Requests work, step by step.
Step 1: Create a file request
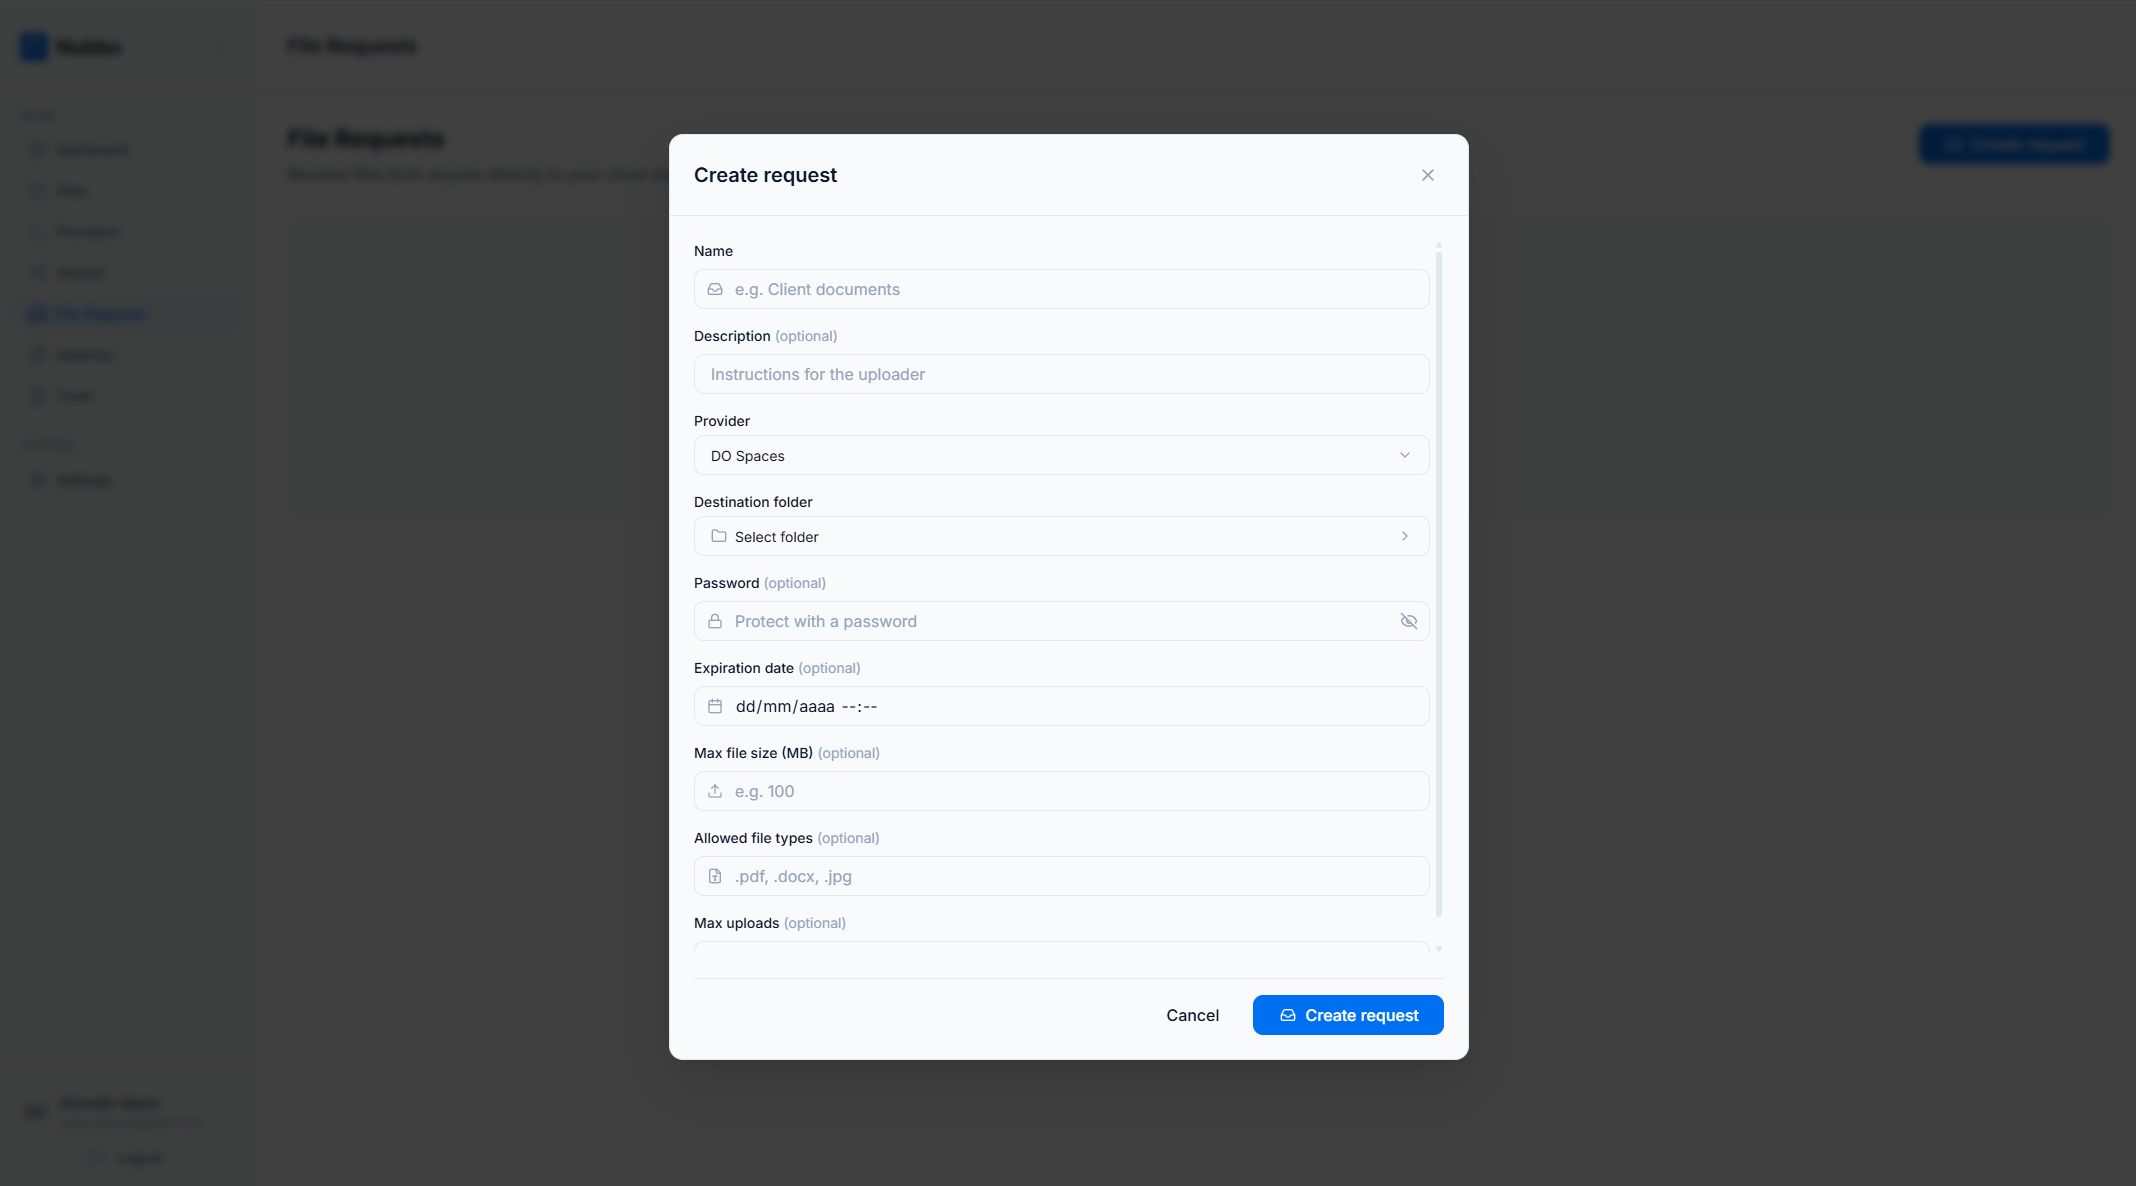
In your Nubbo dashboard, go to the File Requests section and click “Create.” Give the request a name that helps you identify it later, like “Q2 brand assets from Acme Corp” or “Wedding photos — raw files.”
Step 2: Choose the target folder
Select the folder in your bucket where uploaded files should land. This is a real folder in your actual cloud storage, not a staging area or temporary location. When someone uploads a file through the request, it goes straight to that folder.
Step 3: Configure restrictions
This is where you control what gets uploaded and who can access the link:
- Password protection. Require a password before the upload page is accessible. Useful when the link might be forwarded or shared beyond the intended recipient.
- File type restrictions. Accept only specific formats. If you need PDFs and nothing else, you can enforce that. If you need images only, restrict to
.jpg,.pngand.webp. - Maximum file size. Set a per-file size limit to prevent unexpectedly large uploads from filling your storage.
- Expiration date. The link automatically stops working after the date you set. No need to remember to disable it manually.
- Upload limit. Cap the total number of files that can be uploaded through the link.
Step 4: Share the link
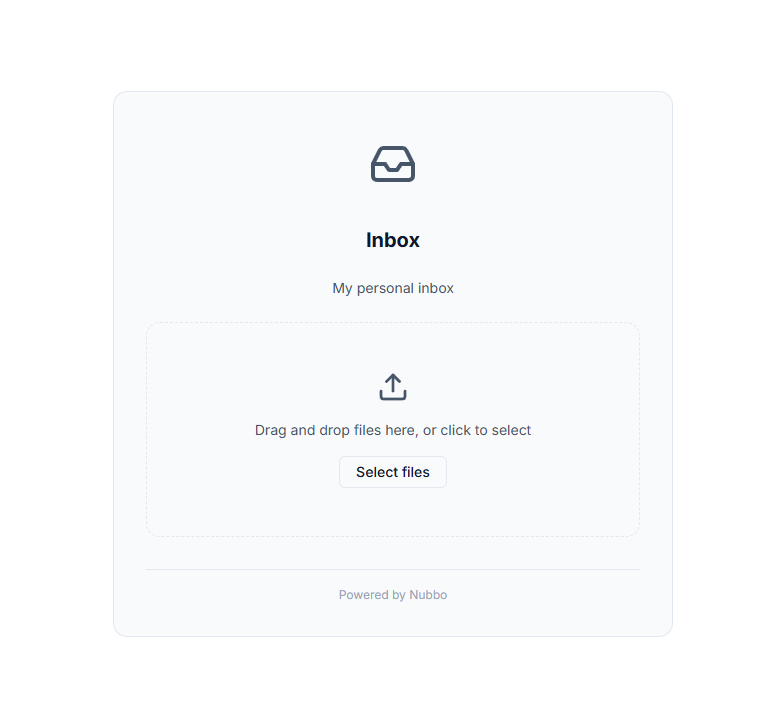
Copy the generated link and send it to your client by email, Slack, text or any other channel. The client does not need a Nubbo account, cloud credentials or any software installation. They open the link in their browser, see a clean branded upload page, and drag and drop their files.
Step 5: Files arrive in your bucket
Uploaded files are transferred directly from the client’s browser to your cloud storage provider using presigned URLs. This is an important architectural detail: Nubbo never stores or proxies the uploaded files. The data travels directly from the uploader to your S3, R2, Spaces, Wasabi or Backblaze B2 bucket. Nubbo only brokers the connection.
This means your files are governed by your storage provider’s infrastructure, encryption and compliance certifications from the moment they are uploaded. There is no intermediate server holding a copy of your client’s data.
Security and privacy
Receiving files from external parties introduces risk, and the tooling should help you mitigate it rather than add new concerns.
Password protection ensures that only people with the password can access the upload page. Even if the link is shared or intercepted, the password requirement blocks unauthorized uploads.
File type restrictions reduce the chance of receiving malicious or irrelevant files. If you only need documents, there is no reason to accept executable files.
Size limits protect your storage costs. A single uncontrolled upload of several hundred gigabytes could result in a surprise bill from your cloud provider.
Expiration dates enforce the principle of least privilege over time. A file request that was needed for a week should not remain active for months.
Direct-to-provider transfers via presigned URLs mean your data never touches an intermediary. This simplifies compliance considerations and reduces the attack surface. You can read more about how Nubbo handles security on the security page.
Use cases
Freelancers receiving deliverables
If you are a designer, developer or consultant, you regularly need files from clients: brand guidelines, content assets, reference material, signed contracts. A file request gives each client a dedicated upload point that drops files into the right project folder on your storage. No more downloading from email and re-uploading to your drive.
Agencies collecting client assets
Agencies often need to collect large volumes of assets from multiple clients simultaneously: logos, product photos, copy documents, video footage. Each client gets their own file request link pointing to their own folder. The assets arrive organized and ready to use, without anyone needing access to the agency’s storage.
Teams receiving uploads from external collaborators
Product teams working with external contractors, translators or content creators need a way to receive work without adding those people to internal systems. A file request provides a scoped upload channel: the collaborator can send their deliverables, but they cannot see or access anything else in the bucket.
Quick comparison with alternatives
| Method | File size limit | Privacy | Recipient needs account | Files land in your storage |
|---|---|---|---|---|
| Email attachments | 25 MB (typical) | Varies by provider | No | No (stuck in inbox) |
| WeTransfer (free) | 3 GB | Files stored on third-party servers | No | No (requires download + re-upload) |
| Google Drive shared folder | 5 TB | Google’s infrastructure | Yes (Google account) | Partially (Google’s storage, not yours) |
| Nubbo File Requests | Your provider’s limit | Direct to your bucket, no intermediary | No | Yes |
The most significant difference is the last column. With Nubbo, files go directly to the storage you already own and manage. There is no intermediate step, no re-uploading and no third-party copy of your data.
Getting started
If you already use S3, R2, Spaces, Wasabi or Backblaze B2 for your project files, adding a file request takes about a minute. Connect your bucket to Nubbo, create a request, configure your restrictions and send the link.
You can explore how File Requests work on the feature page or browse your existing storage with Nubbo’s file browser. If you are ready to try it, create your free account and set up your first file request today. Your clients get a clean upload experience, and your files arrive exactly where they belong.